How to Keep Your Hat On
Hat Attachment Methods
Learn How to Keep Your Hat On
Looking at pictures of gravity-defying headwear styles at society events and horse races, you may have asked yourself, “How are they keeping those pieces on their heads?” This is a great question!
When designing your own hats and headpieces, you must remember to take attachment methods into consideration. Think about the best way for your client to keep their new headpiece securely (and comfortably) in place early in the design process. It is no fun to be worrying about your hat falling off when you are trying to enjoy a special occasion. And who will be wearing the headpiece? If it is for a high activity client like a stage performer, then a combination of combs and elastics may be necessary. Plus, some people may have a hairstyle or texture that may limit their headwear choices.
You should also think about what materials you have access to and what you are able to make. For instance, quite advanced millinery skills are required to create the intricate wire supports needed for some hat styles.
When you make a hat or fascinator, there are a variety of options for head attachment. Let’s go over the basic choices…
Hat Elastics
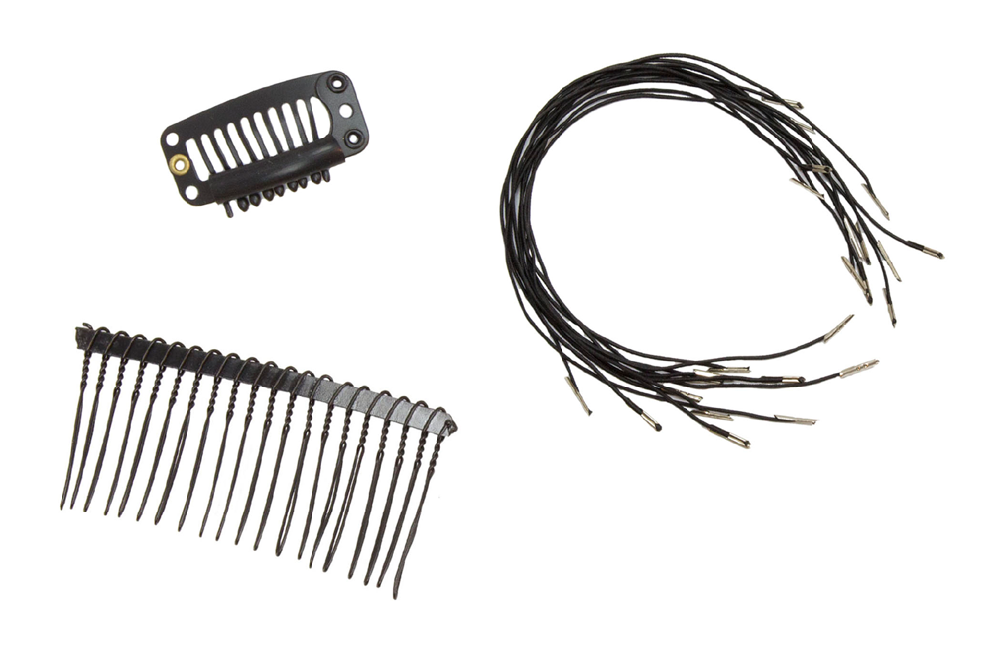
Hat elastics are thin elastic cords with metal barbed ends. The elastic is meant to be worn behind the head, under the hair. These can easily be installed on your piece by tucking the barbed edge through a space in the stitching of the inner ribbon headband. Pull the barbs through and flatten along the seam to secure.

Combs
Hair combs are simple tools that can be used alone, or in combination with an elastic or a headband. They come in metal or plastic and in a variety of sizes; I prefer to use metal combs as this eliminates breakage possibilities. There are a few different styles of combs. Combs with twisted wire prongs are nice as they give you a place for a bobby pin to be used for additional security. There are also small combs that have a snap closure which can work well for small fascinators.
Headbands
Headbands (also known as hairbands or Alice bands) are a great option for wearing highly slanted and saucer hat styles. They also make a good foundation for crowns or headpieces. You can make your own headbands out of millinery wire and tubular crin for a professional finish that can be hidden in the wearer’s hair.
Pre-made headbands come in a variety of materials and sizes, but again I prefer metal to prevent breakage. You can wrap a metal headband with ribbon or tulle to create a finished look and provide a surface for sewing. Sewing a comb to a wrapped headband can also be helpful; just remember that it is best to sew the comb forward-facing to help hold the piece on when the client leans over.

Wire Kickstand
This technique will take a little more practice, but it makes a very professional and easy to wear look. You will need some cotton or rayon covered millinery wire and a pair of wire working pliers. I prefer to use 19-gauge rayon, as the rayon has a smoother finish. A kickstand is basically a piece of wire that has been bent into a pair of prongs.
Leaving a few inches of straight wire at the end, use your pliers to bend a 90-degree angle into the wire. About 4” – 5” down the wire, make a 180° degree bend with a U shape at the end. Complete a “T” shape in the wire by making another 90° bend next to the first. These will need to be bound with thread to secure the joint. Move a few inches down the wire and repeat the “T” shape, then leave a wire end matching the starting end. The bent wire is sewn into the hat next to the edge wire of the hat, under the ribbon band.

Try using (and wearing) all kinds of hat attachments. They all have their pros and cons. It is important as a milliner to be prepared for your clients’ needs and to be able to judge what will best to keep each of your designs firmly in place.
You can find elastics, combs and headbands at Humboldt Haberdashery.
Products
View all
